Search This Blog

Tuesday, August 10, 2010

Pillow #1

I always wash my quilts before giving them to someone else.  If I wash it once myself, I can confidently say  its been washed, dried, and will not run.  So, I loaded my rose bud quilt and pillow covers into the washer.  Tossed in two color catchers, and set it to a 4 minute gentle cycle.  My intention was wash, dry and to post a picture of all three pieces so you could see the quilted texture.  I hope you can see it.  (I haven't yet found a sure-fire way to photograph the texture.)

When I retrieved the goods from the washer - some of the cream colored background pieces had a lilac cast to them.  (That's when I realized that I hadn't prewashed the backing.)  I hung it all up to dry while I mulled over my next step.

Took another stab at it today.  Washed the pillow covers only.  Got all the purple dye out of Pillow #1 - pictured here.  Pillow #2 will be washed again.  There's one area that still looks purplish.  The bigger challenge will be the the quilt.  But Pillow #1  has boosted my confidence that all will end well.  :)

Monday, August 9, 2010

Found It!

After spying the "perfect" baby quilt on the Internet, I sought to find the book it came from.  Online book reviews were positive, and I figured the blaze orange cover would be easy to spot.  My LQS didn't have it in stock, so I headed to Joann's.  Looked in the quilting area and promptly struck out. 


Wandered past the cookbooks and decided to see what treasures I might find. THAT'S where I found my quilting book. Einmo includes not only quilt patterns and sewing tips, but decadent recipes such as The Best Brownies Ever, Cheeseburger Soup, Carrot Cake, etc. I'm guessing that's how the book ended up in the food section. Very clever - appealing to both quilters and cooks!  :)


Sunday, August 8, 2010

Pinless Machine Binding


Cut binding strips using a 1 1/2" metal ruler with a sandpaper finish.  I wish I could tell you where to find this gem, but I bought it over 20 years ago.  Perfect results every time.


Press binding in half, but do not sew the edges together.


Attach binding, right sides together, using a 1/4" foot. THIS is where I made a critical error.  I assumed my seam was true.  Proceeded several steps ahead, only before finding I'd assumed wrong.  As I was ripping, I realized that this process entirely depends on a perfectly executed 1/4" seam.  So I flipped the quilt over and restitched the entire thing.  (I think I'll do this extra step as a precaution in the future.  The time I save by machine binding far outweighs the few minutes it takes to do some QA.)  As you might guess, I was a little  frustrated at this point!


Next step is very important:  STOP.  Back away from the quilt slowly.  Take a deep breath, forget about the quilt, and go directly to a Baby Shower!  (BTW, these folks will be significant in future posts.) 


FOUR generations at one table - you don't see that every day!


When you return, refreshed and renewed, fold and finger press the raw edge of the binding toward the center crease. 


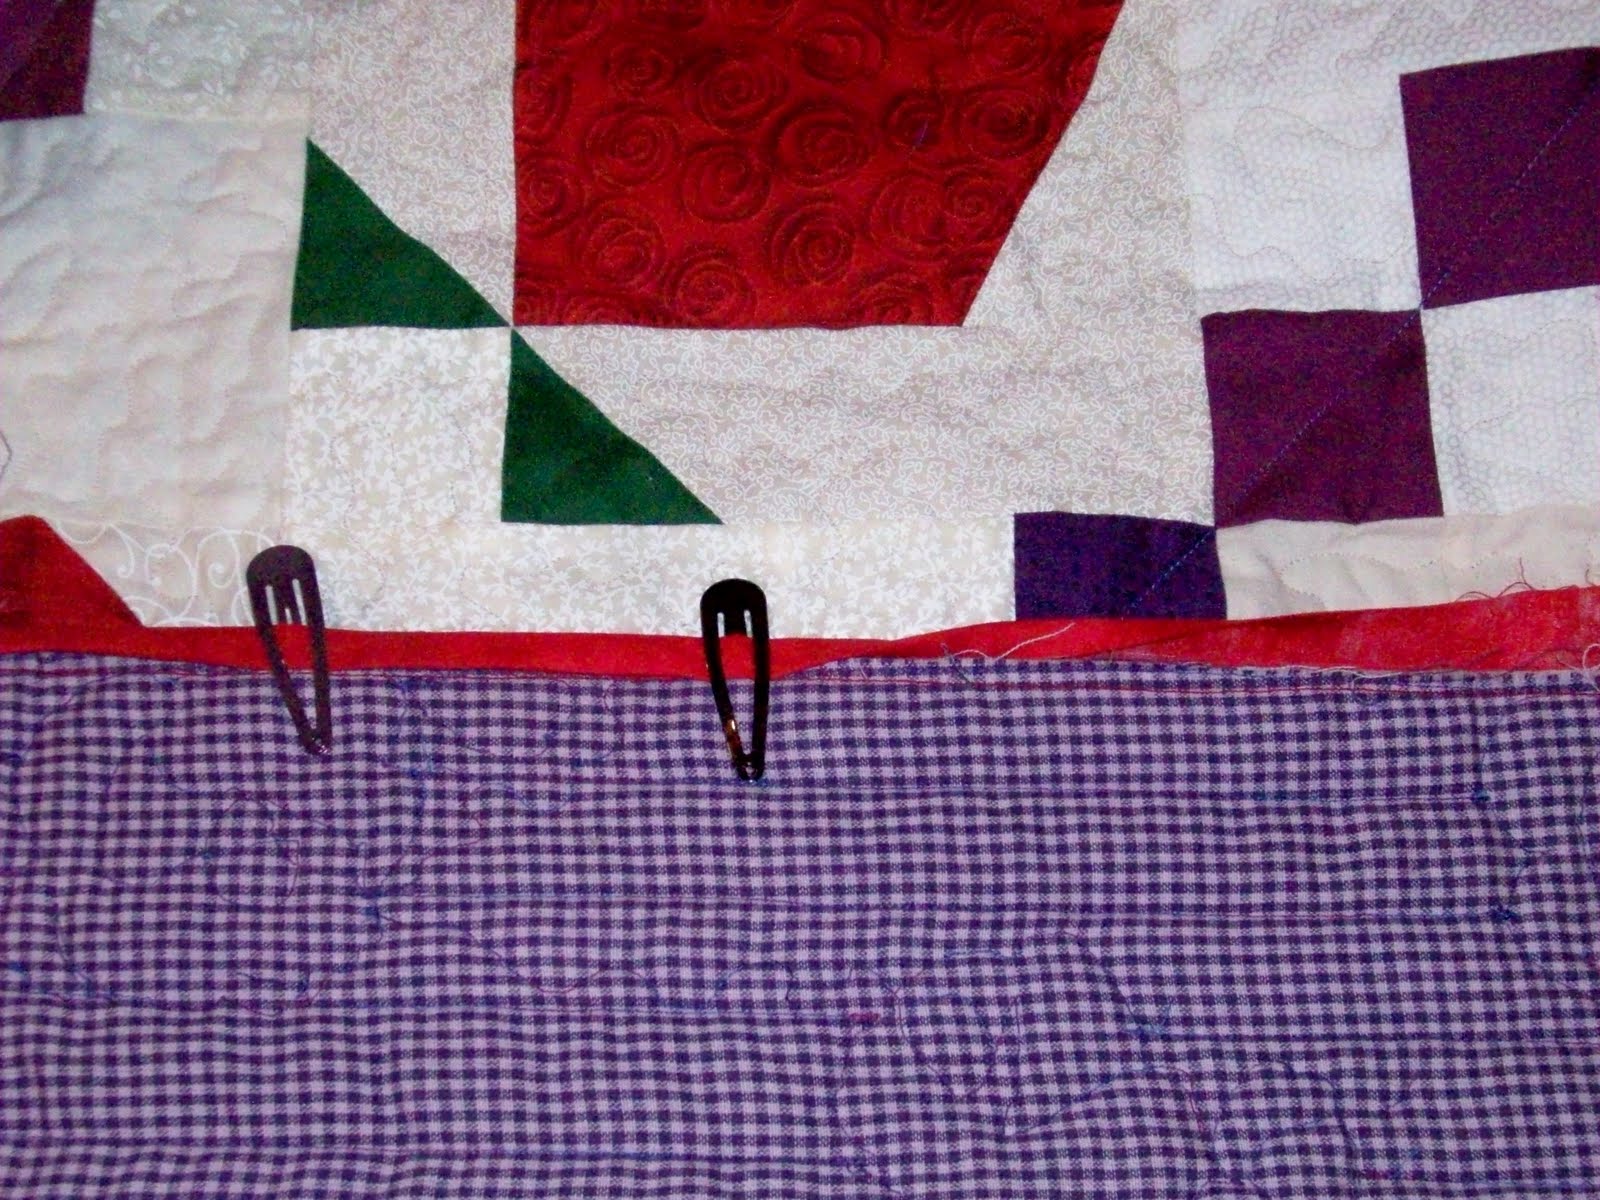
Make sure the center crease is "leaning" a hair toward the back of the quilt, so that the back of the binding is 1/8" wider than front.  This really is the key to sucessful machine binding. Secure with hair clips.  Turn quilt to the front and stitch in the ditch.
 

I had a few false starts, but eventually got the hang of it.  I stitched at a very slow pace, so I could watch both the needle and the ditch guide for best results.


Here's the final product.  Front, and...


...back.  I'm SOOO happy I could complete this in one day...rather than hours and hours of hand sewing!  :) 

Friday, August 6, 2010

1930s Star Chain


I finally tracked down the quilt I'd seen at:  http://quilting.kimberlyeinmo.com/?p=2722.  It comes from Jelly Roll Quilts and More, by Kimberly Einmo.  GOTTA get that book! 

Couldn't resist the temptation to work it up (partially) in EQ6 with the 1930s look.  Einmo makes it with a strippy border - which I love.  It never occured to me to use a jelly roll - probably because I never have!  Usually when I try something new it takes extra time - but a jelly roll could be a big time saver.  Anybody know where I could find Einmo's book, or where I might find some 1930s jelly rolls?

My inner child is having fun thinking about the next project.  My inner adult keeps muttering, "Must finish rose bud quilt...Must finish rose bud quilt...Geez, just FINISH the dang quilt already!" 

Inner adults are no fun!  :)

Thursday, August 5, 2010

Baby Girl Quilt

A friend asked that I make a baby quilt for his future grandchild. The doc says its a girl, so pink it is.  They want a traditional country look.  I gave them some quilt pics to look over.  I think the one they selected looked something like this.  I've always wanted to do a quilt in 1930s reproduction fabrics - so that's what I'm going to suggest.  This means, of course, that I have an incentive to finish quilting the border on my current project! 

New Toys

In my never-ending pursuit of a fitness program that's compatible with my lifestyle, budget, climate and sciatic nerve....I replaced my beat up pedometer, and picked up some walking poles.  A DVD came with the poles.  The fitness trainer made it look so easy - she even jogged with the poles!  You're supposed to use the poles with the natural swing of the arms.  Its more about pushing off than reaching ahead.  It took me a bit to get the hang of it, but it felt pretty natural by the end of my walk.  It definitely provides better balance, and takes some strain off the lower body, especially going uphill.  FYI - Walking poles at Gander Mountain are $150.00 a pair.  I got these at Target for $14.99.  If I like them, I can always upgrade later. :) 

Tuesday, August 3, 2010

Wednesday Weigh In - Lose it by Labor Day


Ready or not, swimsuit season is upon us.  I don't know about you, but I am not (yet) in Esther Williams shape.  I selected this image because Esther here is not an anorexic, air-brushed model - but a healthy, vibrant, physically fit athlete - an inspiration then and now.

To spur us on in our weight loss/wellness efforts, the good folks at Forbes.com have provided 12 diet and exercise "tricks" (all of which are safe) with commentary from the American Council on Exercise, University of Wisconsin-La Crosse, and the American Dietetic Association.  So have a healthy helping of sound advice at:

http://www.forbes.com/2010/08/02/lose-weight-by-labor-day-diet-summer-forbes-woman-well-being-exercise.html

See you at the beach!!

What Are Schnibbles?

Been blogging since September, and I've been wondering all this time: What ARE Schnibbles?  And why do people get such a kick out of doing them, not only often, but on a regularly scheduled basis?  So I did a little research: 


http://en.wikipedia.org/wiki/Schnibble ...says its a 1994 French adventure game and story. THAT's not very quilty!
http://www.missrosiesquiltco.com/Schnibbles.html ...says it comes from a German word, and means a small scrap of fabric.  THIS is sounding better. 


http://www.urbandictionary.com/define.php?term=schnibbles ...offers four definitions.  The first two refer to small bits of paper, and indicates the term sounds German, but alas, it is not.  The fourth refers to stray hairs that stick out of a ponytail.  The third definition is X-RATED!  Who knew??

Miss Rosie wins in my book!  But I still don't know why people find them so addicting.  If you are a shnibbler, perhaps you can enlighten me?  :)

Sunday, August 1, 2010

Kaffe Conundrum

Been wondering how to quilt this outer border.  I wanted to showcase the big red roses, so I outlined them thinking that I'd do some tight background stippling.  I quickly learned that fabric this big and bold can't be given the "usual" treatment. 

It finally dawned on me that the stippling provided no contrast - it was curves on curves.  The title to Kaffe Fassett's latest book (Simple Shapes, Stunning Quilts) provided a clue.  I needed a simple geometric background design, so I echoed the 1" inner borders, with 1" lines "behind" the roses.  I hope you can see the pattern in this picture.  My white chalk line shows up great!  The quilt pattern will show up better when the quilt is (finally) quilted, bound, washed and dried.  I'm eager to finish this project and start something new! 


Before and After

Circumstances beyond my control have resulted in serious garden neglect.  I planted on Memorial Day weekend, and have been unable to tend to my plants ever since.  This weekend a friend came to visit, and offered to help me reclaim control of my yard.   Here's the BEFORE picture.  All my flowers looked like this:
A couple hours (and lots of sunscreen, insect repellant and sweat) later, all my flowers look like this:


Normally by this time, my flowers would be twice this size.  But I'm amazed and grateful they survived with no weeding, no water and no Miracle Grow. Many thanks to my good friend Christine for helping me tackle this daunting task.  :)